Tips to Prepare Your Roof for Spring
Ensuring that your roof is ready for spring is of utmost importance to protect your home from water damage, windstorms, and further deterioration. Regular maintenance, inspections, and timely repairs can go a long way in preserving the integrity of your roof and ensuring the comfort and safety of your home.
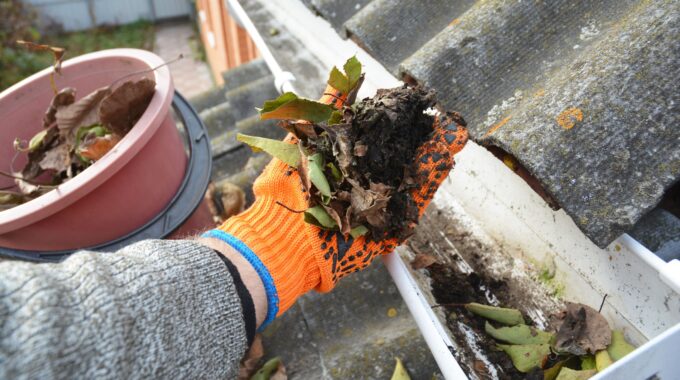
Clean Out Your Gutters
Cleaning out your gutters is an essential task to prevent water damage to your home. Follow these steps to thoroughly clean your gutters and ensure they are free from debris:
- Gather the necessary tools: You will need a sturdy ladder, safety gloves, safety glasses, a garden trowel or scoop, a trash bag or bucket, and a hose.
- Safely position your ladder: Place your ladder on a stable surface, ensuring it is securely grounded. If needed, use ladder stabilizers, or a spotter, to prevent any movement.
- Start removing debris: Begin at one end of the gutter system and work your way towards the other end. Use your garden trowel or scoop to loosen and remove dirt, leaves, pine cones, and any other debris that may be blocking the gutters. Place the debris into a trash bag for easy disposal.
- Check for water stains: After removing the debris, inspect the walls and under the eaves for any water stains or spots. Water stains indicate clogged or overflowing gutters, which can lead to significant water damage if not addressed promptly.
- Prevent water damage: To prevent future blockages and water damage, it may be necessary to install a gutter guard. A gutter guard acts as a barrier, keeping debris out while allowing water to flow freely through the gutters.
Regularly cleaning out your gutters, removing debris, and checking for water stains are vital maintenance tasks to protect your home from water damage. Adding a gutter guard can further enhance the effectiveness of your gutter system and minimize future blockages.
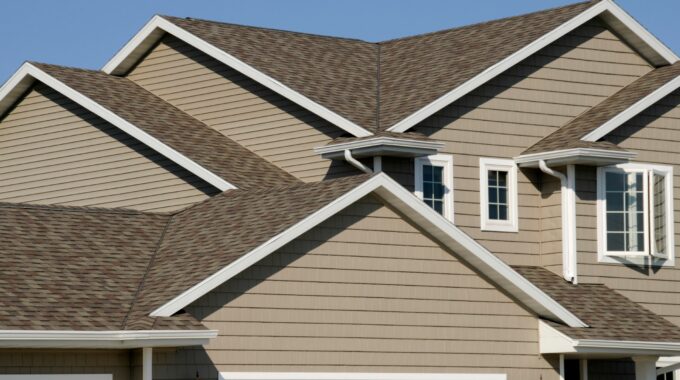
Check for Loose or Missing Shingles
To check for loose or missing shingles on the roof, follow these steps:
- Begin by visually inspecting the roof from ground level. Look for any obvious signs of loose shingles, such as sections that appear to be missing or visibly different from the rest of the roof.
- If you notice any areas that seem suspicious, climb up onto a ladder or use binoculars to get a closer look. Look for shingles that are bent, curled, or pulled away from the building. These can be a result of wind damage or general wear and tear.
- While inspecting the shingles, also keep an eye out for any dark spots or discoloration. This can indicate widespread granule loss. The granules on shingles help protect them from the sun’s damaging UV rays, so if a large number of granules are missing, it may be a sign that the shingles are nearing the end of their lifespan.
- Pay particular attention to sections of the roof that are exposed to greater sun or weather exposure, such as the southern or western sides. These areas tend to have more wear and tear and are more likely to have loose or missing shingles.
By keeping an eye out for signs of loose shingles, missing shingles, bent shingles, curled shingles, and granule loss, you can identify problem areas on your roof and take appropriate action to address them, such as repairs or a complete roof replacement if necessary.
Trim Your Trees
Tree trimming is an essential practice to prevent damage to your roof and ensure the safety of everyone on the property. Regularly trimming trees around your house not only enhances the aesthetics of your landscape but also prevents potential issues. One of the main reasons for trimming trees is to prevent falling branches. Over time, branches can become weak or damaged, posing a significant risk. These falling branches can cause severe damage, puncturing the roof and leading to leaks, water infiltration, and costly repairs. By trimming the trees and removing weak or dead branches, you can significantly minimize the risk of roof damage.
In addition to the risk of falling branches, overgrown trees can create potential structural and functional problems. When branches overshadow your roof, they can block sunlight and restrict air circulation, leading to moisture buildup and accelerated roof deterioration. Trimming the trees allows for proper sunlight exposure and ventilation, reducing the chance of rot and mold growth. Moreover, regular tree trimming enhances safety. Falling branches are not only a danger to the roof but also to individuals walking or spending time near the trees. By keeping the trees properly trimmed, you mitigate the risk of injury to yourself, your family, and visitors.
Check for Mold and Algae
To check for mold and algae growth on your roof, start by inspecting the surface for any visible signs. Look out for black or green stains that may indicate the presence of mold or algae. It is important to identify these growths as they can cause damage to your roof if left untreated.
Once you have identified the affected areas, the next step is to thoroughly clean them. The most effective way to do this is by using a mixture of water and bleach or a dedicated roof cleaner. Dilute the bleach in water according to the manufacturer’s instructions, or use a roof cleaner specifically designed to tackle mold and algae growth. Carefully apply the solution to the affected areas and scrub gently with a brush or soft broom. Be sure to wear protective clothing and goggles to avoid any contact with the solution.
After cleaning the mold and algae, it is crucial to take preventive measures to prevent future growth. Remove any debris, such as leaves or branches, that may collect on your roof and provide a breeding ground for mold and algae. Regularly trim overhanging trees to minimize shade and moisture, which can encourage growth. Additionally, consider installing zinc or copper strips along the ridgeline of your roof, as these metals can help inhibit the growth of mold and algae.
Look for Interior Signs of Water Damage
To identify and address interior signs of water damage, it is important to perform a thorough inspection of the ceiling, walls, and attic. Follow these steps to effectively identify and address any potential water damage:
- Start by examining the ceiling and walls for any signs of water stains or discoloration. Look for yellowish or brownish spots, as well as any areas where the paint may be peeling or bubbling. These are indications of water leaking or pooling behind the surface.
- Inspect the attic for any visible signs of water damage. Check for sagging or wet spots on the ceiling or walls. Discoloration or staining in the attic can be an early warning sign of a leak or water intrusion from the roof.
It is important to address interior signs of water damage promptly to prevent further damage, including mold growth and structural issues. By being vigilant in checking for signs of water damage, you can catch and address issues early, minimizing the potential for costly repairs in the long run.
Related Posts
Why More Homeowners are Choosing Vinyl Siding for Their Home
Vinyl siding has gained widespread popularity as a durable and low-maintenance exterior covering for residential…
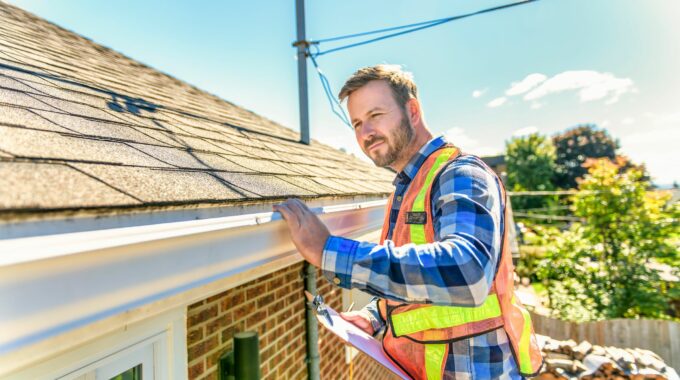
How Often Should You Have a Roof Inspection?
The recommended frequency for completing roof inspections may vary depending on several factors. However, it…

Budgeting for a New Roof: The Cost of Roof Replacement
Before determining the final price or budget range for a roof replacement project, there are…